
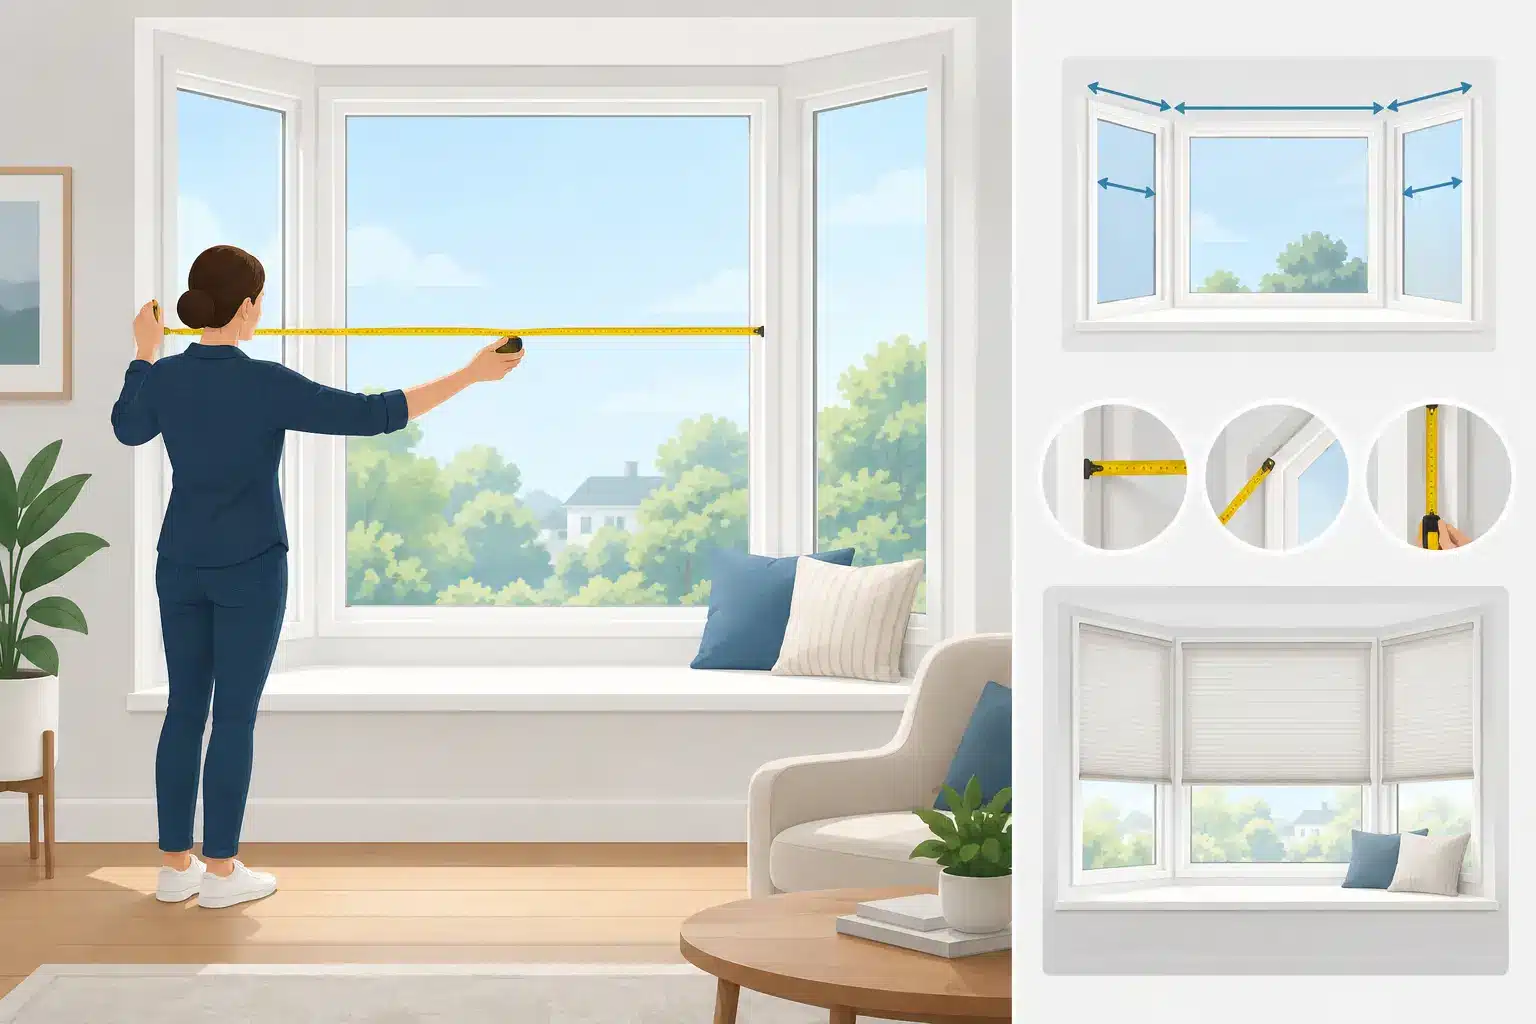
A bay window can be one of the most beautiful features in a home, but its angles make it less forgiving than a standard rectangular window. Knowing how to measure bay windows starts with understanding that every inch affects the final look, from whether shades clear each other when raised to whether shutter panels can open without rubbing.
For homeowners in The Woodlands and Montgomery County, bay windows often bring welcome natural light and a more open view. They can also bring afternoon glare, heat, privacy concerns, and a design decision that involves three separate window sections working as one. Careful measuring gives you the information needed to choose a treatment that looks intentional and operates comfortably.
Start by Identifying Your Bay Window Configuration
Most bay windows have three sections: a larger center window and two angled side windows. A traditional bay usually has side windows that project at 30- or 45-degree angles. A bow window may have four or more narrower sections in a gentle curve. Some homes also have box bays with sides that meet the center at 90 degrees.
That geometry matters because the treatment is not measured as one wide opening. Each section needs its own width, height, depth, and clearance information. A cellular shade, roller shade, woven wood shade, blind, or interior shutter may be mounted inside each opening. Drapery may instead be installed across the full bay on a shaped or segmented rod. The right approach depends on the window’s trim, depth, how much light control you need, and the look you want.
Before measuring, decide whether you are considering inside-mounted treatments, outside-mounted treatments, or a layered combination. Inside mounts sit within the window opening for a clean, tailored appearance. Outside mounts install on the trim or wall and can make a window appear larger while reducing light gaps. In a bay, the space between individual treatments is especially relevant.
Gather the Right Tools Before You Measure
Use a steel tape measure with clear inch markings, not a cloth sewing tape. You will also want a pencil, paper or a notes app, a level, and a phone camera. Photos of the entire bay and close-ups of the corners, trim, handles, and any obstructions can answer questions later that numbers alone cannot.
Write down each window separately as left, center, and right while standing inside and facing the bay. Do not assume the side windows are identical. In custom home construction and older homes alike, openings that appear symmetrical can vary by a fraction of an inch.
Measure in inches and record the exact measurement, including fractions. For example, write 34 3/8 inches rather than rounding to 34 inches. Custom treatments are manufactured to fit the space you provide, so rounding can create unnecessary gaps or a treatment that is too tight to operate properly.
How to Measure Bay Windows for an Inside Mount
Inside-mounted shades, blinds, and shutters need enough unobstructed depth for the product’s brackets, headrail, or frame. Start by measuring the depth of each opening from the front edge of the window frame to the closest obstruction, such as the glass, crank handle, lock, or insect screen frame. Measure at the top where installation hardware will sit.
Next, measure the width of each opening in three places: across the top, middle, and bottom. Record the narrowest of the three measurements. Window frames are rarely perfectly square, and the narrowest measurement helps prevent a treatment from binding.
Measure the height in three places as well: left, center, and right. Record the longest height for most inside-mounted shades and blinds, unless the manufacturer’s specifications say otherwise. The bottom of the treatment needs to reach the sill or lower edge evenly, while the headrail must fit at the top.
For each section, also check whether the sill is level. Place a level along the sill or measure from the top of the opening down to the sill at several points. A noticeable slope may affect how a shade stacks, how shutters align, or where a treatment should stop.
Measure the Corner Clearance
The corners are the detail most often missed in a DIY bay-window measurement. Two individual treatments installed near an angled corner need room for their headrails and mounting brackets. If they are specified too wide, they can collide when raised or leave no practical space for installation.
Measure from the front edge of one window opening to the front edge of the adjoining opening at the corner. Then measure the available flat mounting surface on each side of that corner. This helps determine the appropriate deduction between treatments, often called a corner clearance or “gap.” The amount required depends on the product. A slim roller shade may need far less clearance than a wide cellular-shade headrail or a shutter frame.
Avoid guessing at deductions based only on a diagram or an online measurement chart. Product profiles differ by collection, lift system, and size. Motorized shades, for example, may have larger headrails than manually operated versions. A professional consultation confirms the required spacing for the exact treatment you select.
Watch for Obstacles Inside the Opening
Look beyond width and height. Window cranks, handles, locks, tilt-in mechanisms, trim details, and deep mullions can all affect installation. If a window opens inward, a treatment installed too close to the sash may interfere with operation. If the bay includes a seat, determine whether you want the treatment to stop above it or extend down behind it.
For privacy and light control, note where light enters at the angled side windows. A small gap at the corner may be barely noticeable in a formal living room, but it can matter considerably in a bedroom or media space. This is one reason a layered design, such as inside-mounted shades with side panels, can be a smart solution.
Measuring for Outside-Mounted Bay Window Treatments
Outside mounting is often the better choice when window openings are shallow, uneven, or crowded with hardware. It can also provide stronger room darkening because the treatment overlaps the opening rather than fitting inside it.
For each window section, measure the width of the area you want to cover, including the desired overlap beyond the opening. Then measure from the proposed mounting point above the window to the point where you want the treatment to end. Check that the mounting surface is flat and substantial enough for hardware.
In a bay window, outside-mounted treatments may be installed separately on each section or mounted across the entire front. Separate shades preserve the architecture of the bay and offer independent light control. A continuous drapery treatment can soften the angles and create a more formal, finished presentation. Neither is automatically better – it depends on the room, your privacy needs, and whether you want to highlight or visually simplify the bay.
When measuring for drapery, consider the return, or the distance from the wall to the front of the rod. In a projecting bay, this depth determines whether panels will clear the sill, furniture, and surrounding walls. A straight rod across the front creates a different effect from a custom bent rod that follows the window’s angles.
Choose a Treatment Before Finalizing Measurements
Measurements should always be checked against the treatment you plan to install. Wood blinds, for instance, need room for a headrail and stacked slats. Cellular shades are excellent for insulating glass areas but need clearances at angled corners. Plantation shutters require carefully measured frames and precise panels, particularly when windows include dividers or unusual sill shapes.
Motorization adds another consideration. It offers convenient control for hard-to-reach bays and helps manage Texas sun throughout the day, but you will need to identify the power source and account for the product’s motorized headrail. Battery-powered systems are often flexible, while hardwired options may be best planned during construction or remodeling.
The goal is not simply to obtain a set of dimensions. It is to select a treatment that fits the architecture, performs well in daily life, and looks balanced from every angle of the room.
When a Professional Measure Is Worth It
A homeowner can take preliminary measurements to narrow down options and begin a design conversation. Final measurements, however, are best handled after the exact product, mount type, lift system, and installation method are chosen. Bay windows combine angled geometry with product-specific requirements, leaving little margin for error.
At Made in the Shade Woodlands, an in-home consultation makes that process much easier. A trained local consultant can assess depth, corner clearance, light exposure, mounting surfaces, and design goals while bringing product samples directly to your home. Once your selections are made, precise measuring and professional installation help ensure the finished treatment operates as beautifully as it looks.
Your bay window deserves more than a close-enough fit. Bring your measurements, photos, and questions to the conversation, then let the final details be guided by the treatment that will make the room feel comfortable, private, and distinctly yours.

